Moving Databricks from one Azure subscription to another

Jaco Jansen van Vuuren
Software DeveloperI recently needed to move a Databricks instance from one Azure subscription to another - online resources on this topic were scarce - so I thought I could contribute a little something to the world. Hopefully it's useful to someone.
Can't I just change the subscription?
Unfortunately - this is not an option for Databricks - so it has to be done manually. The process is rinse and repeat once you know what to do.
Before we start - navigating and downloading files from the databricks filesystem
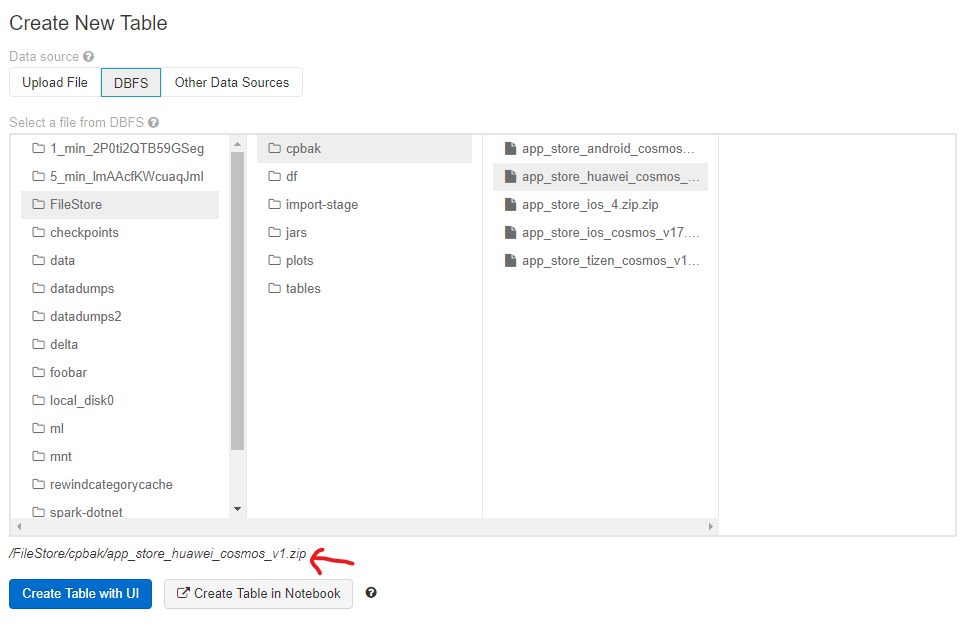
This is an essential skill needed to follow along - as you'll need to download several files from your old instance. By far the easiest way to view your databricks file structure is via the "Data" tab.
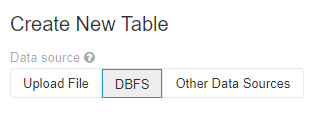
On the side tab go to "Data" and then click on "Add Data". Once the page loads switch the tab to DBFS.
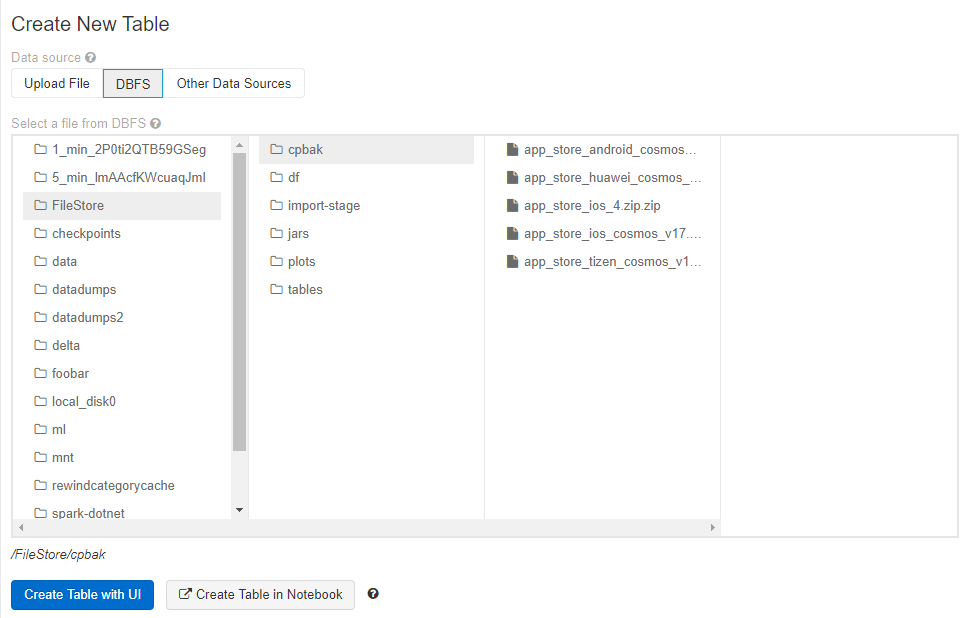
Everything in the "FileStore" directory can downloaded by accessing a url. For example - if you wanted to download the file from /FileStore/cpbak/app_store_huawei_cosmos_v1.zip you can go the following url to download it https://{your-sub-domain}.azuredatabricks.net/files/cpbak/app_store_huawei_cosmos_v1.zip
note: "FileStore" becomes "files"
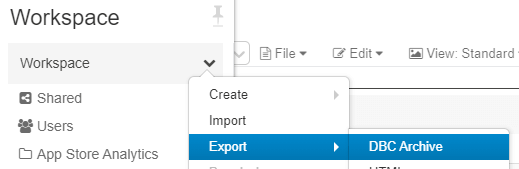
Exporting/Importing the workspace
First things first - we need to export and import our workspace from the old instance to the new instance.
- On the old instance - export your workspace. Make sure to select "DBC Archive".
- On the new instance - start the import.
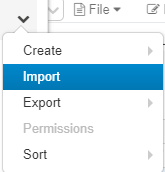
- Select the .dbc file that was exported during step one and click import.
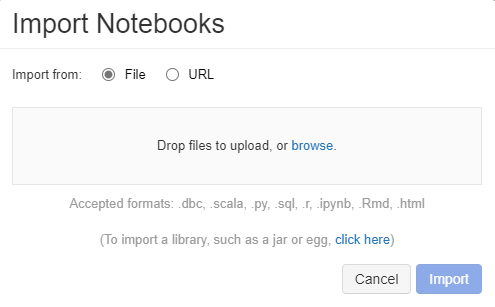
Your workbooks will now all be on the new Databricks instance.
Recreate interactive cluster(s)
The next thing you'll want to do is recreate the cluster that you use for running/testing things interactively - this means all of the following:
- Selecting the same Spark/Scala/Python versions & sizing it appropriately
- Installing the same jar files and/or Maven dependencies
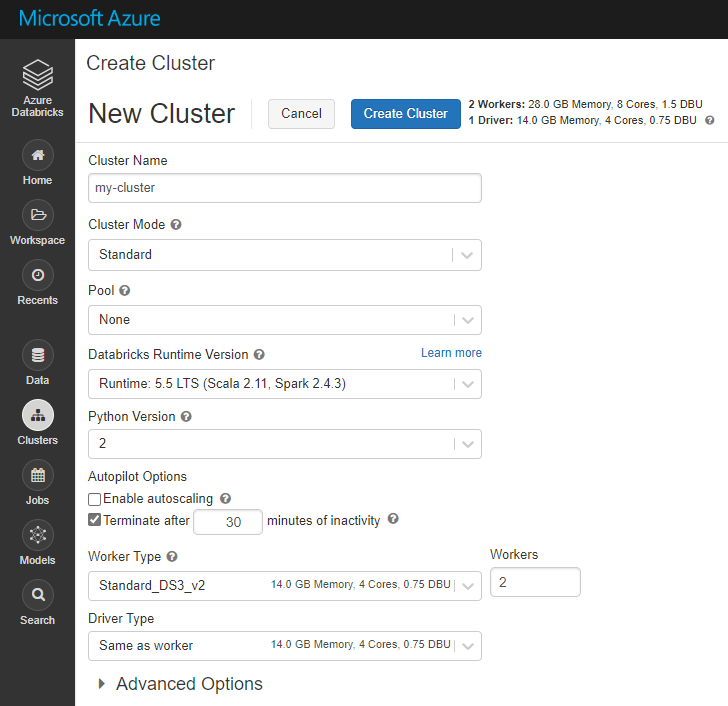
- On the side tab go to "Clusters", then click "Create Cluster", copy the details of your existing cluster over to the new cluster - make sure you keep versions the same so that you don't have errors when running your notebooks. When you have filled in the details - click "Create Cluster"
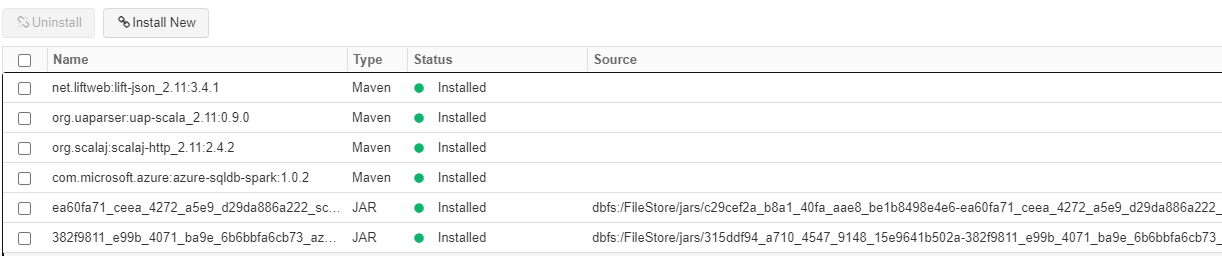
- Once the cluster is recreated you'll need to reinstall any libraries that were installed on the old cluster. On the side tab go to "Clusters", then click on your newly created cluster. When your cluster loads - switch to the "Libraries" tab

- Install any libraries until you match the old instance. Make sure your versions are the same!
Export/Import data
To export your data - use the following. It will export your data as CSV to the file store so that you can download it.
You can read more about it here - there are easier options you can use if your dataset has less than a million rows.
After downloading your exported CSV data we can upload it to the new Databricks instance.
- On the side tab go to "Data" and then click on "Add Data". Select the CSV file you just downloaded. Click on "Create Table With UI", select your cluster and then "Preview Table"
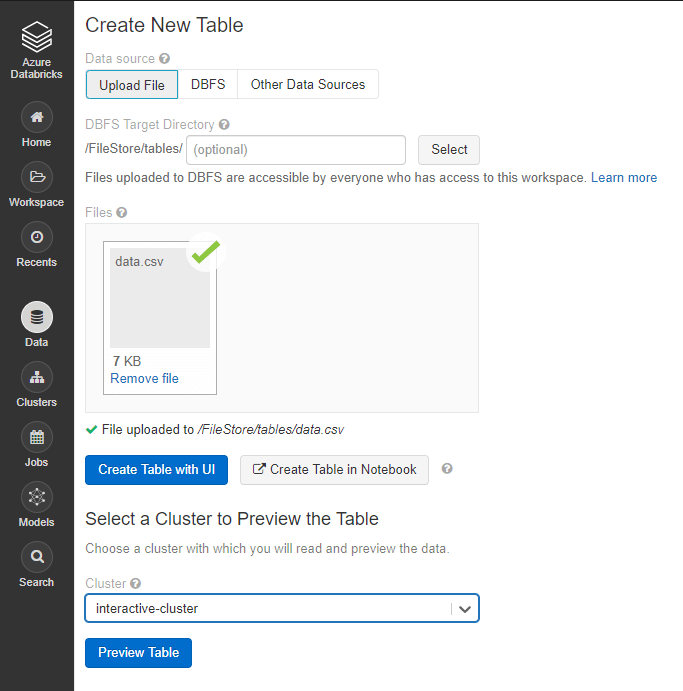
- Make sure your data is parsed correctly and that the schema matches the schema on your old cluster. When you are happy - click on "Create Table". (Don't infer schema on a large file - it will take a very long time!)
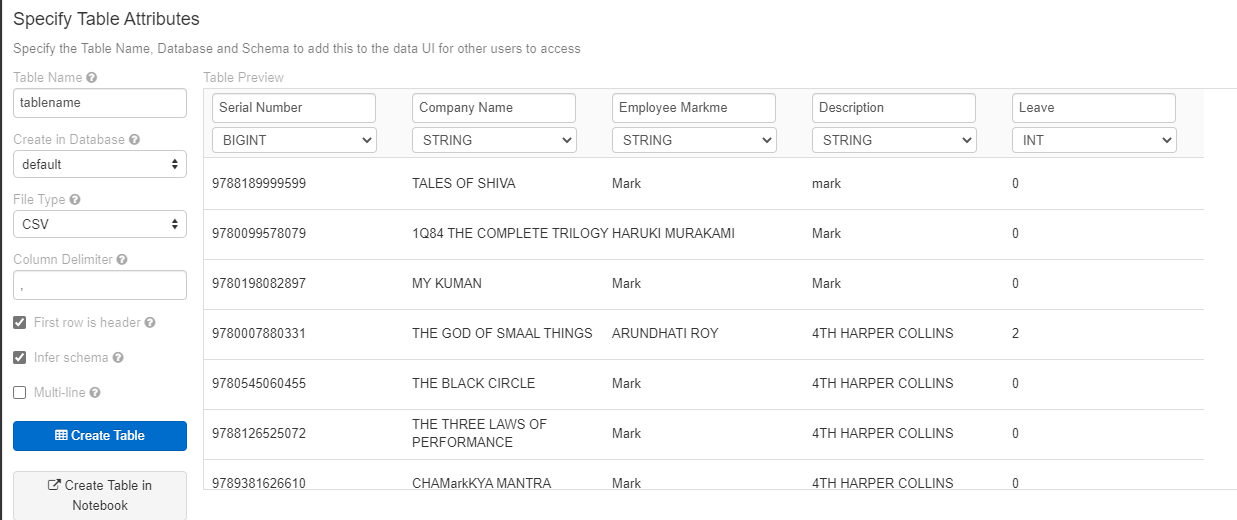
- Optional - you can optionally create the database schema using delta and then insert the imported data into that table - this is my preferred method because sometimes the CSV files are more than 2GB large and I need to import several distinct files. Just make sure the table name is different than the delta table when importing
If your file is larger than 2GB - try to gzip it. If it is still too large I wrote the following nodejs utility to split the CSV. If you have a lot of data - I highly recommend adding the folder where this code executes to your antivirus exclusion list.
After the splits have been created - use GZIP for some extra savings. If you are on Windows - you may need to install WSL.
If you are struggling with uploading via the web interface you can do the following:
- Upload the split files to Azure Storage
- Download the files to your databricks instance storage
- When creating the table - switch to the DBFS tab, find and select your csv file and then do the import
Export/Import checkpoints
If you use structured streaming - you'll most likely need to move your checkpoints as well.
If you are going to move checkpoints - it's probably a good idea to move the data at the same time; furthermore - you want to make sure that the notebook that changes the checkpoint is also stopped before initiating the move. Otherwise you might lose some data.
- On your old cluster - export your checkpoints to zip files
- Download your checkpoint zip file using the DBFS explorer
- Upload the downloaded zip file to Azure Storage
- Import the zip file on your new cluster by downloading and unzipping it
That should be it
You should be almost all of the way now with the migration - I would recommend that you make sure you have done everything in the following list as well:
- Set up your jobs
- Make sure the clusters that your jobs use are the same as in the old cluster
- Make sure you have the same schedules for all your jobs
- Make sure everything works after you are finished by running your notebooks and monitoring scheduled jobs
- Clean up any extra files you may have left in storage containers - to mitigate incurring costs
Good luck!